Carisma V60S Brushless ESC Manual
NOTE: All instructions, warranties and other collateral documents are subject to change at the sole discretion of Carisma RC. For up to date product literature please visit: www.carismarc.com and click on the support tab at the bottom of the main page.
The following terms are used throughout the product literature to indicate various levels of potential harm when using this product: -
WARNING: Procedures, which if not properly followed, create the probability of property damage, collateral damage, and serious injury OR create a high probability of superficial injury.
CAUTION: Procedures, which if not properly followed, create the probability of physical property damage AND a possibility of serious injury.
NOTICE: Procedures, which if not properly followed, create a possibility of physical property damage AND a little or no possibility of injury.
WARNING: Please Read The Entire Manual to become familiar with the features of this product prior to assembly, setup or use, in order to operate correctly and avoid damage or serious injury. Failure to operate the product correctly can result in damage to the product itself, to personal property and could possibly cause serious personal (or third-party) injury.
WARNING: This product is not intended for use by children without direct adult supervision. Do not attempt disassembly, use with incompatible components or augment product in any way without the express approval of Carisma Radio Control.
QUICK SPEC
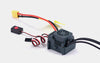
TYPE: Sensorless Brushless Electronic Speed Control
CONSTANT/PEAK CURRENT: 60A/90A
RESISTANCE: 1.7mΩ
FUNCTIONALITY: Proportional forward, proportional reverse with braking delay
INPUT VOLTAGE: 2S LiPO or 6 cell NiMH
B.E.C VOLTAGE OUTPUT: 6V/2A
OVERLOAD PROTECTION: Thermal
DIMENSIONS: L40mm x W32mm x H19mm
WEIGHT: 51g
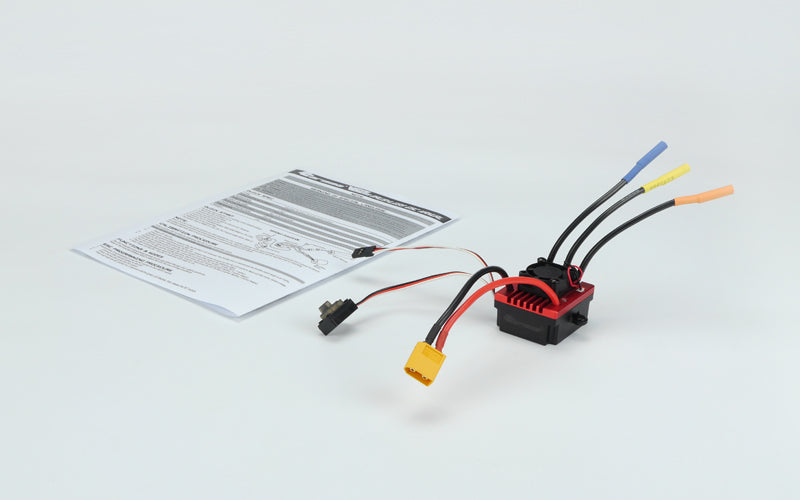
QUICK START
The fastest way to get the E.S.C working using default settings.
- Mount the ESC and Motor in car.
- Connect the ESC to the Motor.
- Connect the ESC Receiver lead to CH2 on your Receiver.
- Ensure the ESC switch is OFF.
- Connect a FULLY CHARGED battery (Max 6Cell NiMH or 2S LiPo).
- Calibrate ESC to the transmitter.
- Set battery Type to NiMH or LiPo.
NOTE: Mount the ESC in the correct location as often specified by your vehicle’s manual. Use double-sided foam tape to secure the speed control in position and avoid excessive vibration in use. Ensure all wiring connections can be reached prior to mounting. Use double-sided foam tape to secure the switch to a convenient location in the vehicle.
CALIBRATION PROCEDURE
Ensure proper ESC function by calibrating the ESC to your transmitter inputs.
NOTE: THE MOTOR WILL NOT RUN DURING CALIBRATION.
- Power OFF the ESC.
- Ensure your transmitter is powered ON, the throttle is not reversed, the throttle trim is neutral and the throttle travel range is at 100%. Disable any special functions such as ABS, etc.
- Press the SET button while powering ON the ESC. Release the button as soon as the red LED starts to flash and the motor emits a beep.
- Calibrate the throttle points by pressing the SET button once after each of the following steps: -
-
First Set Neutral: leave the throttle at rest, untouched and press the SET button (1 green flash; 1 motor).
-
Then Set Full Throttle: pull the throttle fully back, then press the SET button (2 green flashes; 2 motor beeps).
-
Then Set Full Brake/Reverse: push the throttle fully forward, then press the SET button (3 green flashes; 3 motor beeps).
-
Lastly Power off the ESC. The ESC is calibrated and ready to run.
FUNCTIONS & MODES
The ESC includes programming options so you can adjust the way your vehicle performs. Refer to the included settings table to adjust the ESC for your driving conditions
ESC PROGRAMMING PROCEDURE
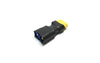
Programming is accomplished using the SET button on the ON/OFF switch.
- Connect a fully charged battery to the ESC.
- Power ON the ESC using the ESC switch.
- Press and hold the SET button for 3 seconds until the green LED flashes, then release the SET button.
- Press the SET button once until the green LED blinks once in sequence, indicating programmable value 1 is currently selected. Pressing the setup button once more moves to programmable value 2, etc. until the desired programmable value is reached. The system continues in a ‘loop’.
- When at the desired menu item, hold the SET button for 3 seconds until the red LED blinks. The RED flashing sequence indicates the actual setting; for example one flash indicates value 1 is selected, two flashes indicates value 2, etc..
- Press the setup button in sequence to select the desired programmable value. The system continues in a “loop.”
- Save the setting by holding the SET button for 3 seconds. The motor beeps once.
- Power OFF the ESC then immediately power it ON. The setting change is stored.
NOTE: ONLY ONE SETTING CAN BE SAVED AT A TIME.
PROGRAMMABLE ITEMS
NOTE: Default Settings for each Item are: 1, 2 ,3, & 4
- Running Mode Forward w/ brake Forward/Reverse w/ brake
- Drag Brake Force 0% 5% 10% 20%
- Low Voltage Cut-off non-protection 3.0V/Cell 3.2V/Cell 3.4V/Cell
- Start Mode Level 1 Level 2 Level 3 Level 4
- Max Brake Force 25% 50% 75% 100%
- Punch Level 1 Level 2 Level 3 Level 4
DESCRIPTIONS
- Running Mode:
-
Forward Only with Brake is Intended for competition use, this mode allows only forward and brake controls. No reverse to stop racers cusing accidents on track.
-
Forward/Reverse with Brake This mode is the basic all-around mode, allowing forward, reverse and brake controls. To engage reverse while moving forward, apply the brake until the vehicle has come to a complete stop, release brake, then apply the brake again. While braking or in reverse, engaging the throttle will result in the vehicle immediately accelerating forward.
-
Drag Brake Force: Adjusts the amount of brake automatically applied when the throttle is returned to the neutral position. This simulates the engine braking effect of a full-scale vehicle, allowing improved turn-in and your vehicle’s general response to controls.
-
Low Voltage Cut-off: This function helps to prevent battery over-discharge. The ESC continuously monitors the battery’s voltage. If the voltage falls below the voltage threshold for 2 seconds, the output power shuts off and the red LED flashes twice repeatedly. The cut-off threshold calculation is based on individual Li-Po cell voltage. For Ni-MH batteries, if the voltage battery pack is higher than 9.0V, it will be treated as a 3-cell Li-Po battery pack; if it is lower than 9.0V, it will be treated as a 2-cell Li-Po battery pack. Example: for a 8.0V Ni-MH battery pack used with a 2.6V/cell threshold, it will be treated as a 2-cell Li-Po battery pack and the low-voltage cut-off threshold will be 5.2V (2.6 x 2=5.2).
-
Start Mode: Sets the initial throttle punch when the car accelerates. Level 1 gives a very soft initial acceleration and Level 4 gives a stronger initial acceleration.
-
Max Brake Force: Adjusts the maximum braking force. A higher value provides stronger braking, but can also cause the wheels to lock, resulting in loss of control of the car.
-
Punch Select: Level 1 (Soft) to Level 9 (Very aggressive). If you choose Levels 7–9, use a high quality battery pack with powerful discharge ability. Without a high quality battery pack, the modes will not give a bursting start effect. If the motor does not run smoothly (IE: 'Cogging'), choose a better quality battery or change the gearing to a higher ratio.
LED STATUS EXPLAINED
NO LED are lit In the neutral position.
RED LED lights when the car is moving forward, reversing or braking (using a sensorless motor).
GREEN LED lights when the car is moving forward, reversing or braking (using a sensored motor).
RED LED 'flashes' if the battery voltage has reached it's Low Voltage Cut-off Level.
RED & GREEN LEDs light alternately, indicating the ESC overheating protection is enabled.
RED LED lights solidly if the receiver signal is incorrect or Intermittent or missing.
TROUBLESHOOTING
SYMPTOM: ESC switch powered ON, but no motor function and no audible tone.
SOLUTION: Recharge or replace battery Ensure all connections are secure. Repair or replace ESC switch or ESC Ensure ESC programming for battery is correct for your battery.
SYMPTOM: Motor turns in the wrong direction.
SOLUTION: Change connections of any 2 motor wires to the ESC & ensure motor turns in the correct direction.
SYMPTOM: Motor stops & RED ESC LED flashes.
SOLUTION: Recharge or replace battery.
SYMPTOM: RED & GREEN LEDs alternate flashing.
SOLUTION: Let motor and ESC cool, changing set up or gearing to avoid overheating.
SYMPTOM: Motor accelerates irregularly or sufferers 'Cogging'.
SOLUTION: Replace battery with a better quality unit offering more Amperage. Change to a higher gearing to reduce load and current draw.
SYMPTOM: Motor does not turn continuously in response to throttle.
SOLUTION: Ensure good communication between Transmitter and Receiver.